 (Image via
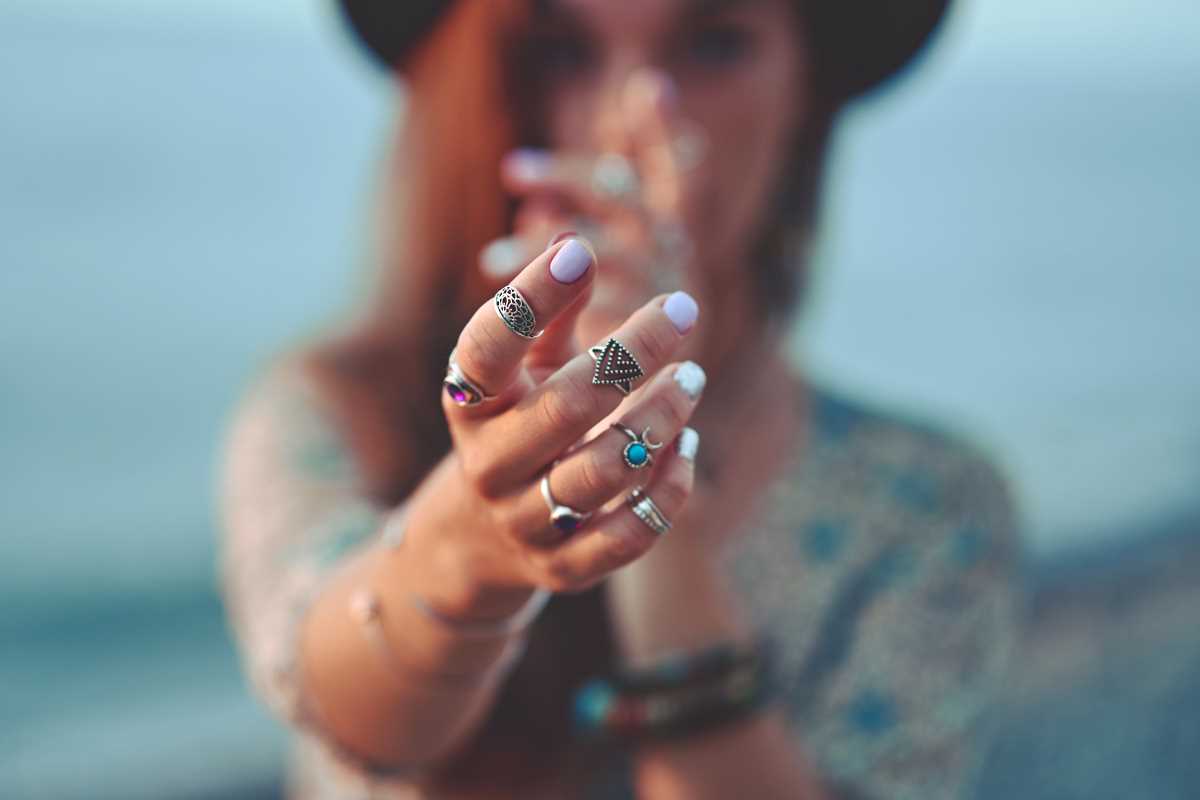
Beaded jewelry is having a moment, and honestly, it’s easy to see why. There’s something incredibly magnetic about wearing something you made yourself. The beads, the colors, the patterns all come together to tell a personal story, and that’s something you just can’t buy at the store. DIY beaded jewelry is not only a fun creative outlet but also a way to add personality to your style in a totally unique way.
Whether you’re crafting a bold statement necklace, delicate bead rings, or even a retro-inspired anklet, the possibilities are endless. Plus, with so many bead options out there—from glass to wood to clay—toys for your creativity are infinite. If you’re ready to turn a handful of beads into wearable art, here’s everything you need to know to get started.
Why Beaded Jewelry?
Jewelry has always been a way to express yourself, but beads bring a distinct versatility that few other materials can match. They can be casual or upscale, minimal or over-the-top. You can craft a single piece for everyday wear or an intricate design for a special occasion.
The charm of DIY beaded jewelry lies in the control you have over the design. Instead of settling for what’s popular in stores, you can make pieces that reflect your favorite colors, shapes, or even memories. For example, you might use a bead from an old vacation souvenir or incorporate a charm with sentimental value. No mass-produced jewelry can compete with that sort of personal touch!
Essential Tools and Materials
Before you whip out your design notebook, you’ll need a few basic tools to bring your ideas to life. Don’t worry, starting your beaded jewelry stash won’t break the bank! Here’s what you’ll need.
Beads! Lots of Beads
Naturally, beads are the stars of the show. You’ll find them in every shape, size, and material imaginable. Some popular options include glass, plastic, wooden, metal, and gemstone beads. If you’re just starting out, try a mix-and-match bag of beads to keep things fun and experimental.
Stringing Materials
Choosing the right stringing material depends on your project. Elastic cords are perfect for stretchy bracelets. Nylon thread or beading wire works best for necklaces and earrings. Leather cords can create a more bohemian vibe.
Tools of the Trade
- Beading needles for threading the tiniest beads.
- Pliers for crimping, cutting, and hooking findings securely.
- Crimp beads to fasten your work and keep your beads in place.
- Clasps and hooks for necklaces and bracelets that need closures.
Organizers
Once you start buying beads, you’ll realize how quickly a small stash can turn into a chaotic pile. Invest in a bead organizer to keep your materials sorted by size, shape, and color.
Getting Started with Simple Projects
Experimenting with simple designs is the best way to practice your skills and discover your style. Here are a few beginner-friendly ideas.
The Classic Stretch Bracelet
Stretch bracelets are the epitome of “easy but cute.” They don’t require tools or complicated techniques, just a stretchy cord and your favorite beads. Simply string the beads onto the elastic, tie a secure knot, and trim the excess cord. Experiment with colors to create a bracelet that complements your outfits.
A Minimalist Beaded Necklace
Minimalism never goes out of style, making this project a great pick for first-timers. Select a handful of beads you love and thread them onto a dainty chain or thin cord. You can add small metallic accent beads for a polished look.
Dangling Bead Earrings
Earrings might seem intimidating, but they’re actually super approachable once you get used to the process. Using headpins and beads of your choice, attach the beads into a sequence using round-nose pliers. Then, hook them onto earring wires, and voilà!
Tips for Elevating Your Jewelry
While simple designs are great, you might want to level up your jewelry-making skills as you gain confidence. Here’s how to take your DIY beading to the next level.
Play with Patterns and Shapes
Instead of randomly stringing beads, experiment with patterns! Combine beads of different sizes or play with alternating colors. Creating a geometric design can give your pieces a modern twist, while irregular bead shapes lend a more bohemian or earthy feel.
Incorporate Unique Finds
Thrift shops, flea markets, and even old jewelry can be treasure troves of unique beads and charms. Repurpose elements from discarded necklaces or bracelets to create something entirely new. Adding beads that have history or character makes your jewelry feel even more special.
Mix Materials
Don’t limit yourself to just one type of bead! Combine wood, gemstone, and metal beads for something unexpected. For a little drama, add tassels, feathers, or natural elements like shells or stones. A variety of textures instantly elevates your pieces.
Style Inspiration
DIY beaded jewelry isn’t just fun to make; it’s endlessly wearable. Here’s how to style your creations for maximum impact.
Layered Necklaces
Beaded necklaces shine when layered together. Pair a short colorful choker with a long pendant necklace for a boho-inspired look. Play with both dainty and chunky strands to create dimension.
Stacks on Stacks
When it comes to bracelets, more is more. Pile on stretch bracelets or bangles in complementary colors and patterns. For an extra style twist, mix beaded pieces with charm bracelets or cuff bangles.
Earrings That Pop
Bold bead earrings can serve as the star of your outfit. If your beaded earrings are oversized or colorful, keep the rest of your accessories minimal, letting the earrings speak for themselves.
DIY beaded jewelry is as much about the process as it is about the final product. With just a little time and effort, you’ll be making pieces that look straight out of a boutique—but with way more personality. Whether beading becomes a weekend hobby or evolves into a lifelong passion, you’ll always have something special draped across your wrist, neck, or ears.